How to Fillet a Catfish
There’s nothing quite like the taste of fresh catfish, whether it’s fried golden brown with hushpuppies or simmered in a rich stew. But let’s be honest, getting that beautiful, boneless fillet from a whole fish can feel like a real chore, especially if you're not used to it. The slime, the sharp fins, the bone structure – it can be intimidating! This guide is here to walk you through the process, step by step, so you can confidently clean your catfish and enjoy the fruits of your labor without the frustration.
The Right Tools for the Job
Before you even think about putting a knife to a fish, you need to ensure you have the right gear. Trying to fillet a catfish with the wrong tools is like trying to change a tire with a butter knife – frustrating and inefficient. Investing in a few key items will make the whole experience smoother, safer, and much more enjoyable.
Knife Selection
This is perhaps the most crucial piece of equipment. You'll want a knife that is both sharp and flexible. A dull knife is actually more dangerous than a sharp one because it requires more force, increasing the chance of slipping.
First, consider a fillet knife. These knives are specifically designed for processing fish, featuring a thin, flexible blade that allows you to glide along the bone structure and separate the meat cleanly. Blade lengths typically range from 6 to 9 inches, and for catfish, a 7- or 8-inch blade is often a good all-around choice. You might even find some excellent options for a sturdy, flexible fillet knife on Amazon, often with ergonomic handles for a better grip.
Beyond the fillet knife, some anglers also like to have a stiffer boning knife for the initial cuts, especially on larger, tougher catfish. This can help you get through thick skin or tougher areas around the head more easily before switching to the more delicate fillet knife for the main job.
Cutting Surface and Gloves
A stable, easy-to-clean cutting surface is essential for safety and hygiene. A large plastic cutting board is ideal. Avoid wooden boards, as they can absorb fish odors and are harder to sanitize properly. Look for one with a non-slip bottom or place a damp towel underneath to keep it from sliding around on your counter or cleaning table.
Gloves are another often-overlooked item that can save you a lot of grief. Catfish are notoriously slimy, and those pectoral and dorsal fins pack a serious punch with their sharp spines. A good pair of cut-resistant gloves will protect your hands from accidental nicks and scrapes from the knife, as well as those painful fin pokes. They also provide better grip on the slippery fish, giving you more control over your catch and your knife. You can often find durable cut-resistant gloves suitable for fish cleaning through various online retailers like Amazon.
Other Helpful Gear
While not strictly necessary, a few other items can significantly improve your filleting station.
- Fish scaler (optional): Some people prefer to scale catfish, especially smaller ones, if they plan to cook them with the skin on. For filleting, though, you’ll be removing the skin anyway, so it’s not essential.
- A sharpening steel or stone: As mentioned, a sharp knife is paramount. Having a way to touch up your blade throughout the process, or at least before you start, will make a world of difference.
- Newspaper or trash bags: Laying these down under your cutting board can make cleanup much easier. You can simply roll everything up and toss it when you're done.
- Cooler with ice: Once filleted, your precious fish meat needs to go on ice immediately to preserve its freshness. Have a cooler ready and waiting. This is especially critical if you’re fishing in the warm Mississippi summer months. You'll want to review Best Way to Keep Fish Fresh on a Hot Day to ensure your fillets are pristine.
- Clean towels: Useful for wiping down your hands or cleaning up stray pieces.
- Running water: Having access to a hose or sink makes rinsing fish and tools much simpler. For advice on where you can clean your catch, refer to Mississippi Fish Cleaning Station Rules.
Step-by-Step Catfish Filleting Process
Okay, you’ve got your gear, your fish, and you're ready to get to work. Remember, practice makes perfect. Don't get discouraged if your first few fillets aren't picture-perfect. The goal is to get good, edible meat, and that will come with time. Before you begin, make sure you understand Mississippi Fishing Regulations Explained and any specific Mississippi Fishing Creel and Size Limits for catfish.
Preparing Your Catch
First things first, make sure your catfish is as clean as possible. Give it a good rinse to remove any loose slime, dirt, or debris. If you've been on a trip targeting Catfish Fishing in Mississippi, your fish should ideally be fresh out of the cooler or livewell.
Next, it’s crucial to understand the anatomy of the catfish, especially those nasty spines. Catfish have sharp, venomous spines on their pectoral fins (on each side, behind the gills) and one on their dorsal fin (on their back). These can cause painful stings, so handle the fish carefully. Many experienced anglers will actually clip these spines off with heavy-duty scissors or pliers before they start filleting, especially on larger or more aggressive fish. This simple step can prevent a lot of pain and make the filleting process much safer.
Lay your catfish on your cutting board, belly-side down. You want it stable and still.
Making the Initial Cuts
This is where the magic begins. You're aiming to separate the meaty sides of the fish from the bone structure.
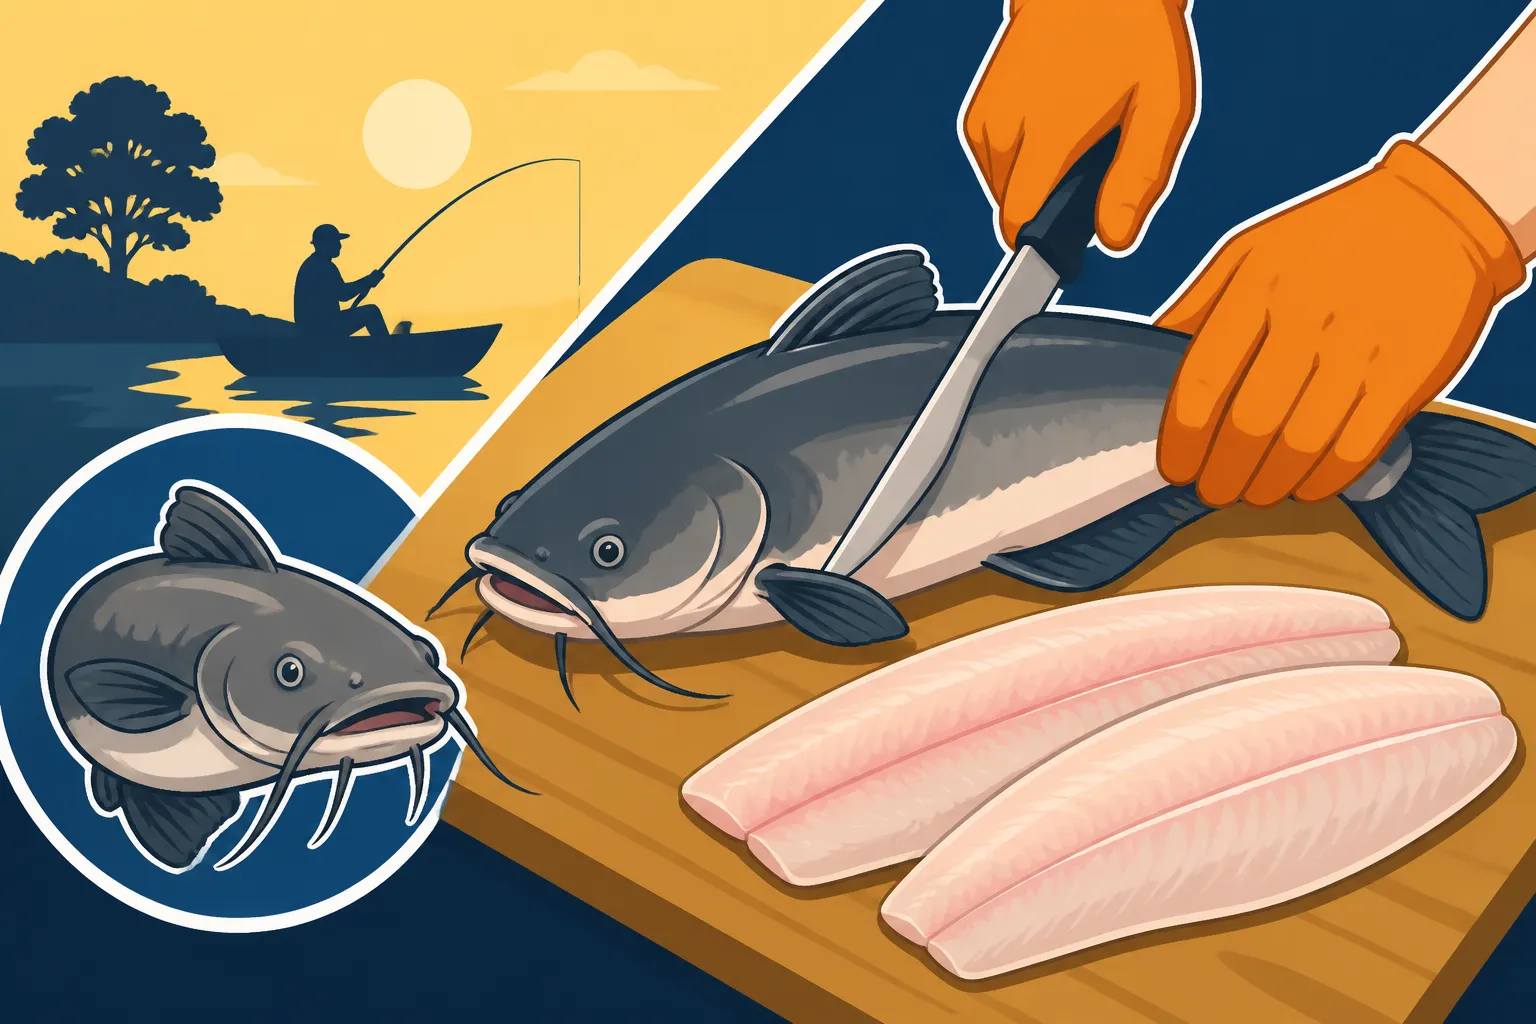
- Behind the Head: With your sharp fillet knife, make a deep cut directly behind the pectoral fin and gill plate, perpendicular to the fish's backbone. Cut down until you feel the backbone. Do not cut through the backbone itself, just up to it. This cut should go from the top of the fish down to just above the belly cavity.
- Along the Backbone: Now, turn your knife so the blade is running parallel to the backbone. Starting from your initial cut behind the head, carefully guide your knife along the top of the backbone, working your way towards the tail. Keep the knife blade pressed against the bone as much as possible to maximize your meat yield. You'll feel the blade scraping against the ribs as you go.
- Over the Ribs: As you move past the initial shoulder section, you'll encounter the rib cage. Gently flex the fillet away from the bones as you cut, allowing your flexible blade to follow the contour of the ribs. The goal is to scrape the meat clean off the bones. Once you clear the rib cage, continue cutting all the way down to the tail. Don't cut through the tail skin just yet – leave a small hinge of skin to help you with the next step.
Separating the Fillet
With your initial cuts made, one side of the fish should now be mostly separated from the backbone, held only by a small piece of skin near the tail and some connective tissue around the belly.
- Freeing the Fillet: Go back to the rib cage area. Using short, controlled strokes, carefully slice the meat away from the remaining rib bones. You can often feel these bones with your fingers, guiding your knife to scrape the meat clean. For a more visual guide, imagine you're scooping the meat off the ribs.
- Completing the First Fillet: Once all the meat is free from the bones, cut through the small hinge of skin near the tail to completely remove the first fillet. Place this beautiful piece of meat aside, ideally on ice or in a separate clean container.
- Repeat for the Other Side: Flip the fish over and repeat the entire process for the other side. Make the cut behind the head, run the knife along the backbone, and then carefully separate the fillet from the ribs and the tail.
Skinning the Fillet
Catfish skin is tough and fatty, and most people prefer to remove it for a better eating experience. This is where that small tail hinge from the previous step (if you left it) really comes in handy. If you already cut the fillet completely free, no worries, you can still skin it, it just takes a slightly different approach.
- The Tail Hold: Lay your fillet skin-side down on the cutting board. If you have that tail hinge, grip it firmly with your non-dominant hand. If not, make a small cut at the very end of the fillet, just through the meat, and then grasp the skin firmly.
- Angle Your Knife: Now, angle your fillet knife blade very slightly downward, almost parallel to the cutting board, with the sharp edge facing away from your hand. Place the blade between the skin and the meat at the tail end.
- Slide and Peel: Apply downward pressure to the knife against the skin, and begin to saw back and forth with short, quick strokes while simultaneously pulling the skin with your other hand. As you pull the skin, keep the knife angled, letting it glide between the skin and the meat. The goal is to leave all the meat on the cutting board and pull away only the skin. It might take a few tries to get the hang of it, but once you do, it becomes quite satisfying. If you're struggling, try placing your knife handle on the cutting board and just pulling the skin straight up and towards you, letting the blade do the work. This technique works wonders.
Removing the Red Meat and Pin Bones
Even after skinning, your fillet might have a line of darker, reddish meat along the lateral line (where the "bloodline" was). This meat can sometimes have a stronger, oilier flavor. Many people prefer to trim this out.
- Trim the Red Meat: Lay your skinned fillet flat. You'll see a noticeable darker stripe running down the center. Using your fillet knife, carefully slice along both sides of this stripe, removing it in a thin strip.
- Check for Pin Bones: While catfish generally have fewer troublesome pin bones than some other species, it’s always a good idea to run your fingers along the length of the fillet to feel for any remaining small bones. If you find any, you can either pull them out with a pair of clean pliers or tweezers, or make a small V-cut around them to remove the section. Compared to How to Fillet a Crappie, catfish are often a bit easier in this regard.
Once you’ve got your beautiful, boneless, skinless fillets, give them a final rinse in cold water, pat them dry, and get them on ice immediately! They're ready for your favorite recipe.
Tips for Cleaner, Safer Fillets
Filleting isn't just about getting the meat off the bone; it's about doing it efficiently, safely, and with minimal waste. These tips will help you refine your technique.
Keeping Your Knife Sharp
We can't stress this enough: a sharp knife is your best friend. A dull knife makes you work harder, causes ragged cuts, and is far more prone to slipping, which could lead to injury.
- Before You Start: Always check your knife's sharpness before you begin. A good test is to try and slice a piece of paper cleanly. If it tears, your knife needs sharpening.
- During the Process: Depending on how many fish you're cleaning, your knife might dull mid-way through. Keep a sharpening steel or a small sharpening stone handy. A few quick passes on the steel can often bring the edge back enough to finish the job. If you’re processing a large haul, say after a successful day at one of the Mississippi River Catfish Hotspots, you might need to take a break and properly sharpen your blade.
- After Each Use: Clean your knife thoroughly after each filleting session and give it a quick sharpening. Store it properly to protect the blade and prevent accidents.
Handling Different Catfish Sizes
The techniques are generally the same, but the approach might vary slightly depending on the size of the catfish you've caught.
- Smaller Catfish (under 2-3 pounds): These can sometimes be trickier because there's less meat and the bones are smaller. Use a shorter, more flexible fillet knife (perhaps a 6-inch blade). You'll need a delicate touch to avoid wasting meat. For these smaller fish, some anglers might even prefer to "steak" them (cut cross-sections) rather than fillet, cooking them on the bone.
- Medium Catfish (3-10 pounds): This is the sweet spot for filleting. There’s enough meat to work with, and the bone structure is pronounced enough to guide your knife. An 8-inch fillet knife is usually perfect here. These are the size most commonly caught when pursuing Best Bait for Catfish in Mississippi using traditional methods.
- Larger Catfish (10+ pounds, or even "Trophy Catfish in Mississippi Waters"): Larger fish present their own challenges. The skin can be tougher, and the bones thicker. You might start with a stiffer boning knife for the initial cuts to get through the thick skin and muscle, then switch to your flexible fillet knife. The sheer size means more surface area to work with, but also more muscle to cut through. Take your time, and don't rush. You might even find that these larger fish, like some of the impressive blue catfish, require a bit more effort to trim away the darker red meat for a milder flavor.
Safety First
Filleting involves sharp knives, slippery fish, and potentially dangerous fins. Always prioritize safety.
- Wear Gloves: We mentioned them earlier, but it bears repeating. Cut-resistant gloves protect against knife slips and fin pokes.
- Stable Surface: Ensure your cutting board is stable and won't slip. A damp towel underneath works wonders.
- Keep Your Hands Clear: Always keep your non-dominant hand away from the path of the knife blade. Use it to stabilize the fish, but be mindful of where the blade is going.
- Controlled Movements: Use smooth, deliberate strokes. Avoid jerky or overly forceful movements that can lead to slips.
- Spine Awareness: Be constantly aware of those catfish spines. They can really ruin your day. Clipping them before you start is a great preventative measure.
- Proper Disposal: Dispose of fish scraps promptly and properly to avoid attracting pests and to maintain cleanliness. In Mississippi, you might even be able to utilize local Mississippi Fish Cleaning Station Rules for proper disposal, depending on your location. Also, be sure to check specific rules for Can You Clean Fish at the Boat Ramp in Mississippi?.
Maximizing Your Catch: What to Do with Scraps
Once you've got those beautiful fillets, you're left with the carcass, head, and skin. For many, this is simply waste. But for the savvy angler, there are often ways to utilize these "scraps" to truly maximize your catch and minimize waste. Even the Catfish Identification Chart can help you decide if you have a species particularly good for stock.
Using the Carcass for Stock
Don't toss that fish frame just yet! The bones, head (gills removed, please!), and even some of the skin can be used to make a fantastic fish stock. Fish stock is a wonderfully flavorful base for soups, stews, chowders, and sauces. It imparts a delicate, savory flavor that can elevate many dishes.
Here’s a basic idea of how to make fish stock:
- Clean the Carcass: Rinse the fish carcass and head thoroughly. Make sure to remove the gills, as they can impart a bitter flavor to your stock. You can also snip off any remaining fins.
- Combine Ingredients: Place the fish scraps in a large stockpot. Add aromatic vegetables like chopped onions, celery, and carrots. A few peppercorns, a bay leaf, and some fresh parsley stems are also great additions.
- Cover with Water: Cover everything generously with cold water.
- Simmer Gently: Bring the pot to a very gentle simmer over medium-low heat. Do not let it boil vigorously, as this can make the stock cloudy and extract undesirable flavors. Skim off any foam or scum that rises to the surface during the first 20-30 minutes.
- Cook Time: Simmer for about 30-45 minutes. Fish stock cooks much faster than meat stocks; cooking it for too long can also make it taste bitter.
- Strain and Cool: Carefully strain the stock through a fine-mesh sieve, discarding the solids. Let the stock cool completely before refrigerating or freezing it in airtight containers. It’s perfect for making a rich gumbo or a creamy fish chowder.
This is a fantastic way to ensure nothing goes to waste, and it adds another layer of culinary reward to your fishing efforts.
Proper Disposal
Even with the best intentions, some parts of the fish will inevitably be discarded. Proper disposal is crucial for hygiene, environmental protection, and courtesy, especially if you’re cleaning fish in a public or residential area.
- Bag and Tie: Place all fish scraps (heads, bones, skin, guts) into sturdy plastic bags. Double-bag them to prevent leaks and contain odors. You might even find heavy-duty freezer bags on Amazon that work well for this.
- Prompt Disposal: Dispose of the bagged scraps in a secure trash can with a lid as soon as possible. Avoid leaving them out where they could attract scavengers like raccoons, possums, or even stray dogs.
- Composting (with caution): While some advanced composting systems can handle fish waste, it's generally not recommended for home compost piles due to the strong odors and potential to attract pests. If you live in an area with a municipal composting program that specifically accepts meat and fish, that could be an option.
- Away from Waterways: Never discard fish scraps directly into the lake, river, or ocean you were fishing in. While it might seem natural, it can introduce disease, attract unnatural concentrations of predators, and negatively impact water quality. Always respect the natural environment.
By following these disposal guidelines, you ensure that your fishing adventures remain enjoyable and responsible for everyone.
| Step | Key Action | Tools Needed | Important Tip |
|---|---|---|---|
| Preparation | Rinse fish, clip spines if desired | Pliers/heavy-duty scissors, cutting board | Catfish spines are sharp – handle with care! |
| Initial Cut (Head) | Cut behind gill plate to backbone | Fillet knife, cut-resistant gloves | Go to the bone, not through it. |
| Cut Along Backbone | Glide knife along spine to tail | Fillet knife | Keep blade tight against bone for maximum yield. |
| Separate from Ribs | Carefully slice meat off rib cage | Fillet knife | Flex fillet to expose ribs, scrape meat cleanly. |
| Skinning | Angle knife, pull skin, slide blade | Fillet knife, firm grip | Pull skin taut; keep knife flat between skin and meat. |
| Trim & Check | Remove red meat, feel for pin bones | Fillet knife, tweezers (optional) | Red meat can be stronger flavored; remove for milder taste. |
| Final Step | Rinse fillets, place on ice immediately | Cooler with ice, clean water | Speed and cold preserve freshness. |
Disclaimer
This article is for general informational purposes only and does not constitute professional advice. Laws, prices and regulations vary by location and change over time. Consult a qualified professional for guidance on your specific situation.