How to Tie a Fisherman’s Knot for Leaders
It's happened to all of us: you're out on a beautiful Mississippi lake or river, you feel that unmistakable tug, you set the hook, and you're battling a magnificent fish… only for your line to go slack. A quick retrieve reveals a frayed end, a slipped knot, or worse, a clean break right where your leader met your main line. The frustration is real, and it often comes down to one crucial, yet often overlooked, skill: tying a strong, reliable knot. This guide is here to walk you through mastering the Fisherman's Knot, a time-tested, incredibly dependable connection for leaders that can save you from that heartbreaking moment when the big one gets away.
Why a Strong Leader Knot is Absolutely Critical
You might think, "A knot's a knot, right?" Oh, if only it were that simple! In fishing, your knot is often the weakest link in your entire setup. If it fails, everything else—your expensive rod, your high-tech reel, your perfectly chosen bait—becomes irrelevant. Leaders are particularly vulnerable because they're designed to be less visible to fish or offer abrasion resistance, which often means connecting two different types of line or different diameters. This creates a stress point that demands a knot capable of handling the fight.
The Silent Killer: Knot Failure
Think about it: that brief, intense struggle with a feisty largemouth or a stubborn catfish puts incredible strain right on that connection point. A poorly tied knot, or one that’s simply not designed for leader material, can slip under pressure, fray from friction, or just give out. It's not always a sudden snap; sometimes, it's a slow weakening that goes unnoticed until it's too late. When you're using a lighter fluorocarbon leader for stealth or a heavy mono shock leader for casting big baits, the integrity of that connection is paramount. It's the difference between landing a personal best and telling a sad "one that got away" story.
The Fisherman's Knot: A Time-Tested Solution
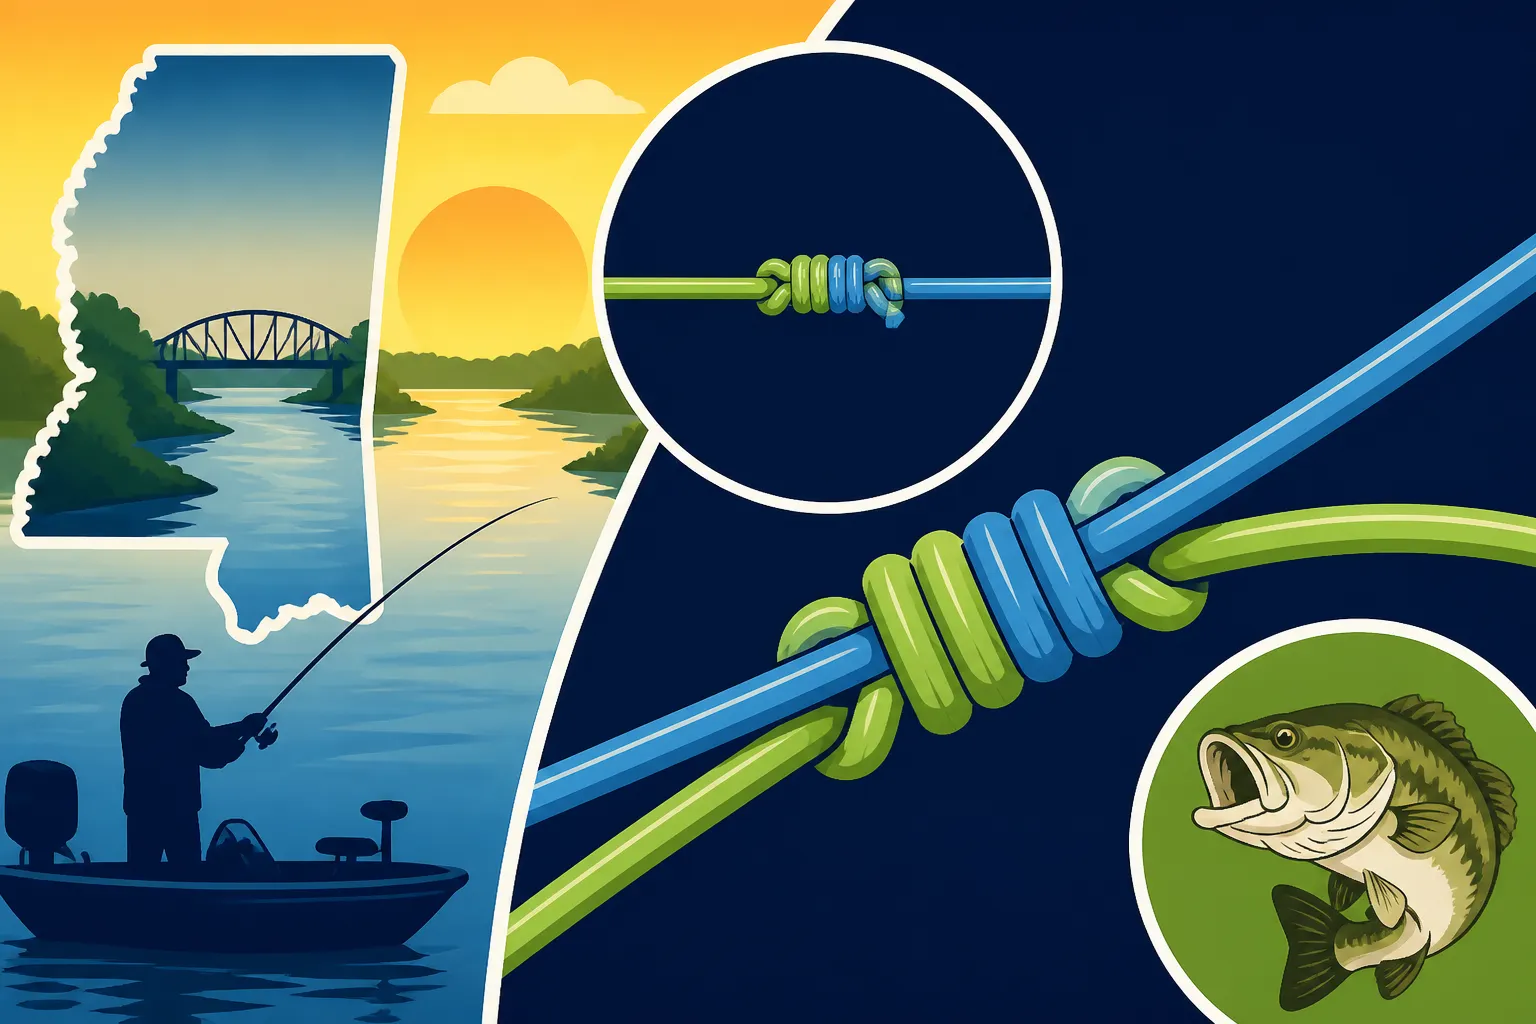
The Fisherman's Knot, sometimes called the "True Lover's Knot" or "Angler's Knot," isn't flashy, but it's a workhorse. It's essentially two opposed Uni Knots, or sometimes described as two barrel knots that snug up against each other. What makes it so good for leaders is its inherent strength and its ability to connect lines of varying diameters quite effectively. While some prefer more complex knots for extreme differences in line size or for specific superlines, the Fisherman's Knot remains a go-to for many anglers connecting monofilament to fluorocarbon leaders or even different sections of monofilament. It cinches down tight, holding firm under pressure, and gives you a reliable connection you can trust. If you're looking for Best Knots for Freshwater Fishing, this one is definitely on the list.
Anatomy of the Fisherman's Knot: What Makes It Strong
Before we dive into the how-to, let's understand why this knot works so well. It’s all about leverage and opposing forces, creating a powerful, self-tightening bond.
The Power of Opposing Uni Knots
Imagine two independent knots, each gripping one of the lines, and then pulling against each other. That's essentially what the Fisherman's Knot does. Each side of the knot tightens around the other line, and as tension is applied to the main line or the leader, those two individual knots pull tighter and tighter against each other, reinforcing the connection. This opposing force distributes the stress across a larger surface area of the line, which helps prevent cutting or weakening of the line itself. It's a clever bit of engineering in a simple package.
How It Handles Different Line Types
One of the greatest strengths of the Fisherman's Knot is its adaptability. While an FG knot might be king for braid-to-fluoro connections, and a Palomar is fantastic for tying directly to a hook, the Fisherman's Knot excels at connecting two strands of monofilament, or a monofilament main line to a fluorocarbon leader. Fluorocarbon, known for its low visibility and abrasion resistance, can be a bit stiffer and sometimes harder to knot reliably. The multiple wraps in a Fisherman's Knot help it grip the slicker fluorocarbon more securely than some simpler knots, forming a smooth, strong junction. It's a great choice when considering Choosing the Right Rod and Reel for Mississippi Fishing and what kind of line you'll be spooling up.
Step-by-Step Guide to Tying the Fisherman's Knot for Leaders
Alright, let's get down to business. Tying this knot correctly is crucial, so take your time, practice, and soon you'll be doing it blindfolded (though I don't recommend that on the water!). You'll need your main line and your leader line. For this example, let's assume you're connecting a monofilament main line to a fluorocarbon leader.
Step 1: Overlap the Lines
First things first, you need to get your lines in position. Take the end of your main line and lay it parallel to the end of your leader line. They should overlap by about 6 to 8 inches. Think of it like a little "X" where they cross, but keep them fairly straight for now. This overlap gives you enough working room for the wraps. It's a common setup for many leader knots, whether you're working on Bass Fishing Techniques for Mississippi Anglers or trying out some new Crappie Fishing Techniques for Mississippi Lakes.
Step 2: Tie the First Half (Uni Knot on Line 1)
Now, pick up one of the lines – let’s say your main line.
- Form a Loop: Take the tag end of your main line and loop it around both the standing part of its own line and the leader line. Create a small loop.
- Wrap Back Through: Now, take that same tag end and thread it through the loop you just made. Don't just go through once; you'll want to wrap it back through the loop 4 or 5 times. The exact number can depend on the line diameter – thicker lines sometimes need fewer wraps (3-4), while thinner, slicker lines like fluorocarbon benefit from more (5-6).
- Snug It Down (Loosely): Gently pull the tag end and the standing part of the main line to snug this first half of the knot down, but don't tighten it completely yet. It should form a neat coil around the leader line. You should now have a loose Uni Knot formed by your main line around the leader line.
Step 3: Tie the Second Half (Uni Knot on Line 2)
Now you’re going to mirror the process with your leader line.
- Form a Loop: Take the tag end of your leader line and loop it around both the standing part of its own line and the main line. Again, create a small loop.
- Wrap Back Through: Just like before, take that tag end and thread it through the loop you just made, wrapping it back through 4 or 5 times. Ensure your wraps are neat and don't overlap haphazardly.
- Snug It Down (Loosely): Gently pull the tag end and the standing part of the leader line to snug this second half down, creating another loose Uni Knot, this time formed by your leader line around the main line.
At this point, you should have two loose, opposing knots, each clinging to the other line, with a bit of space between them.
Step 4: Lubricate and Cinch the Knot
This is a critical, often overlooked step that can make or break your knot's strength.
- Moisten the Knot: Before you pull everything tight, always lubricate your knot. A little saliva works perfectly, or you can use water. This reduces friction and heat as the knot cinches down, which can weaken the line, especially with fluorocarbon. It also allows the knot components to slide smoothly into place, forming a much stronger, more compact bond.
- Cinch Together: Now, gently but firmly pull the two main lines (the standing parts of both your main line and your leader line) in opposite directions. As you pull, watch those two loose knots slide towards each other until they meet in the middle. They should snug up tightly against each other, forming a single, compact knot. Apply steady, increasing pressure to ensure it’s fully tightened. Give it a good hard tug to confirm it's seated properly. This final cinching is what locks everything into place.
Step 5: Trim the Tag Ends
With your knot securely cinched, the last step is to trim off the excess tag ends.
- Leave a Little: Don't cut them flush with the knot! Leave a small stub of about 1/8 to 1/4 inch. This small amount of extra line gives the knot a bit of "wiggle room" and ensures that if it slips ever so slightly under extreme pressure, it won't unravel completely.
- Check for Security: Before you make that first cast, give the knot another strong tug. Feel for any slippage or unevenness. A well-tied Fisherman's Knot should feel solid and secure.
Here’s a quick table summarizing the steps:
| Step | Action | Key Detail |
|---|---|---|
| 1. Overlap Lines | Lay main line and leader parallel, overlapping. | 6-8 inches of overlap for working room. |
| 2. Tie First Half (Line 1) | Loop main line tag end around both lines, wrap 4-5 times through loop. | Snug loosely. Ensure wraps are neat. |
| 3. Tie Second Half (Line 2) | Mirror step 2 with leader line tag end. | Snug loosely. Create another neat coil. |
| 4. Lubricate & Cinch | Moisten knot, then pull main lines gently but firmly apart until knots meet and tighten. | Crucial for strength and preventing line damage. Apply steady, increasing pressure. |
| 5. Trim Tag Ends | Cut off excess tag ends, leaving a small stub. | Leave 1/8 – 1/4 inch of tag end. Double-check knot integrity. |
Tips for Success and Common Mistakes to Avoid
Tying a solid knot isn't just about following steps; it's about understanding the nuances. Here are some pro tips and pitfalls to steer clear of.
Practice, Practice, Practice
I can't stress this enough. The first few times you try to tie any knot, it's going to feel clumsy. Your fingers will feel like sausages, and the line will seem to have a mind of its own. But trust me, with a little dedicated practice, it becomes second nature. Grab some old fishing line or even some thicker string, sit on the couch, and just go through the motions. Do it ten times, then twenty. Soon, you'll be able to tie it quickly and reliably on the boat, even in less-than-ideal conditions. Many anglers will even practice with different line weights, which you can find readily available on Amazon for practice sessions at home.
Always Moisten Your Knot
This is a non-negotiable rule for almost all fishing knots, especially those involving friction. When you cinch a knot tightly, the lines rub against each other, creating heat. This heat can actually weaken and compromise the integrity of your fishing line, sometimes by a significant margin. A bit of saliva or water acts as a lubricant, allowing the knot to slide into place smoothly, minimizing friction and heat build-up. It also helps the knot "seat" properly, meaning all the wraps lay perfectly and snug up evenly, leading to a stronger connection. This is particularly important for lines like fluorocarbon which can be more susceptible to heat damage.
Don't Rush the Cinch
When it comes to tightening the knot, slow and steady wins the race. Don't just yank on it with all your might. Apply gradual, increasing pressure to the standing lines, allowing the two halves of the knot to slide together and compress evenly. If you pull too quickly, the knot can "bind" prematurely, meaning some wraps might tighten before others, leading to an uneven and weaker knot. A smooth, controlled cinching motion ensures maximum strength.
The Right Number of Wraps
While I suggested 4-5 wraps, the ideal number can vary slightly depending on the line type and diameter. Generally, the slicker and thinner the line, the more wraps you'll want (up to 6 or 7). For thicker, stiffer mono, 3-4 might be sufficient. The goal is to have enough wraps to create ample friction and grip without making the knot excessively bulky or causing the line to overlap in a way that weakens it. Experiment a little during your practice sessions to find what feels most secure for your specific lines.
Inspect Your Knot Every Time
Before you cast, always take a moment to visually inspect your newly tied knot. Look for any twisted lines, gaps, or wraps that aren't sitting neatly. A perfectly tied Fisherman's Knot should look symmetrical and compact. If it looks off, it probably is. Don't take chances; cut it off and tie it again. It takes less time to re-tie a knot than to mourn a lost fish and lure. This diligent inspection should be part of your routine for all connections, from your mainline to your leader, and even your Mississippi Fishing License Guide when you head out.
When to Choose Other Knots for Leaders
While the Fisherman's Knot is incredibly versatile, it's not always the absolute best choice for every single leader connection. There are situations where other knots might offer advantages in terms of strength, bulk, or specific line compatibility. Understanding these alternatives will make you an even more adaptable angler.
Extreme Diameter Differences
If you're trying to connect a very thin main line (say, 10 lb braid) to a very thick leader (like 50 lb fluorocarbon for shark fishing), the Fisherman's Knot can sometimes struggle. The significant difference in diameter makes it harder for the thinner line's wraps to adequately grip the thicker line without slipping, or for the thicker line to snug down effectively around the thinner one.
- Alternatives: For these scenarios, knots like the Albright Knot or the FG Knot are often preferred. The Albright Knot excels at joining lines of substantially different diameters and can be very strong. The FG Knot, while more complex to tie, is considered one of the strongest and most streamlined braid-to-fluorocarbon connections, offering incredible strength with minimal bulk, making it glide through rod guides effortlessly. When learning about Mississippi Freshwater Fishing Rules, remember that knowing the right knot for different setups is part of being a prepared angler.
Braided Main Line to Fluorocarbon Leader
Many anglers have a love-hate relationship with tying braid to a fluorocarbon leader. While a well-tied Double Uni (which is essentially a Fisherman's Knot with extra wraps on each side) can work, many find that braid, being so slick, can slip more easily than monofilament.
- Alternatives: The FG Knot is the gold standard for braid-to-fluorocarbon connections due to its slim profile and exceptional strength retention. It’s a friction knot that doesn't involve tying the braid directly to the fluoro with a locking overhand knot, which is often where braid fails. Another excellent choice is a modified Uni to Uni knot, where you add extra wraps for the braided line side to compensate for its slipperiness. When you consider Best Fishing Line for Crappie or Best Fishing Line for Catfish, you'll find braid is often recommended for main lines, making these specific knots vital.
When Bulk is a Concern
Sometimes, you need a knot that is as small and streamlined as possible. For instance, if you're fishing with ultra-light tackle and frequently casting, a bulky knot can "catch" on your rod guides, hindering casting distance and potentially damaging the guides over time. The Fisherman's Knot, while compact for its strength, isn't always the absolute slimmest option.
- Alternatives: Again, the FG Knot wins for its incredibly slim profile. For smaller, more delicate connections where minimal bulk is key, or when tying directly to a swivel or lure, a Palomar Knot or a simple Improved Clinch Knot might be more appropriate. These knots are often quicker to tie and, when tied correctly to a terminal tackle, offer excellent strength. Understanding Mississippi Fishing Regulations Explained often includes recommendations on tackle, and how your knots play into that.
Situational Choices
Ultimately, the "best" knot often comes down to personal preference, the specific lines you're using, and the fishing conditions. Many seasoned anglers have a handful of go-to knots they trust implicitly. Learning the Fisherman's Knot is a fantastic foundation, but don't be afraid to explore others like the How to Tie a Palomar Knot if you find it better suits a particular application. Your goal should always be a knot that gives you maximum confidence, because that confidence translates directly to more enjoyable and successful time on the water.
Disclaimer
This article is for general informational purposes only and does not constitute professional advice. Laws, prices and regulations vary by location and change over time. Consult a qualified professional for guidance on your specific situation.