Best Knots for Freshwater Fishing
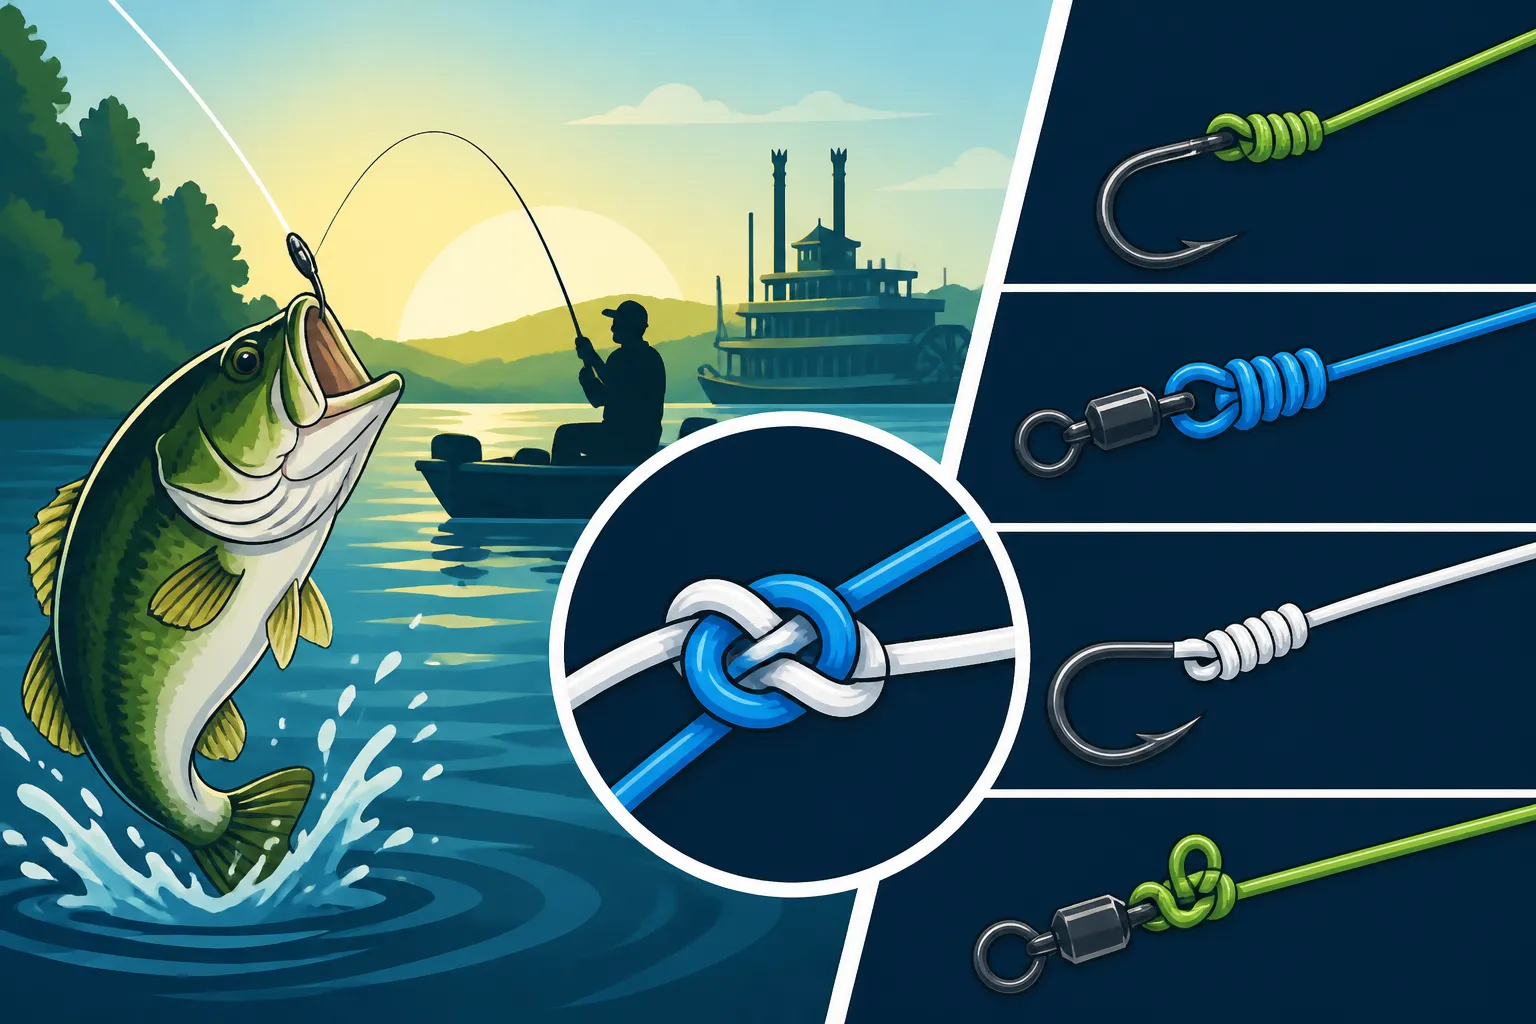
There's nothing quite like the thrill of feeling that solid thump on your line, setting the hook, and battling a feisty fish. It's a moment we all live for on the water here in Mississippi. But then, it happens: a sudden slack line, a heartbreaking snap, and the trophy you were just fighting is gone, taking your favorite lure with it. More often than not, the culprit isn't the fish's size or your rod's strength, but a weak or improperly tied knot. This guide is all about equipping you with the knowledge to tie the strongest, most reliable knots for freshwater fishing, so you can turn those heartbreaks into triumphant catches.
Why Mastering Fishing Knots is Crucial for Mississippi Anglers
When you're out on the water, whether it's a calm morning on Ross Barnett Reservoir or a fast-paced afternoon on the Mississippi River, your connection to the fish hinges entirely on the integrity of your knots. A good knot is often the unsung hero of a successful fishing trip, and a bad one is a swift path to disappointment.
The Heartbreak of a Lost Fish
We've all been there, right? That moment of pure exhilaration when a big Largemouth Bass Fishing in Mississippi explodes on your topwater lure, or a slab crappie loads up your ultralight rod while you're spider rigging. You fight it with all your might, heart pounding, adrenaline coursing. You start to see it, maybe even catch a glimpse of its flash under the surface, and then… nothing. The line goes limp. You reel in to find a perfectly cut line, or worse, a clean break right at the knot. The frustration is immense. You question your gear, your technique, but often, it comes down to a knot that failed under pressure. It's not just the fish you lose; it's the lure, the memory, and sometimes, a piece of your fishing soul! For us Mississippi anglers who cherish every moment on the water, avoiding these moments of heartbreak is paramount.
Strength, Security, and Confidence
The primary purpose of any fishing knot is to maintain as much of your fishing line's original breaking strength as possible. No knot is 100% efficient; every bend and twist in the line creates a potential weak point. However, well-tied knots can retain 80-95% or even more of your line's strength, giving you a huge advantage. This translates directly to security: your hook stays attached, your lure stays on, and your leader holds firm. This security, in turn, builds immense confidence. When you know your knots are tied correctly, you can focus on the fishing itself – reading the water, presenting your bait, and fighting the fish – instead of worrying if your tackle will hold up. Different line types – monofilament, fluorocarbon, and braided line – all have unique properties, and the right knot ensures maximum performance from each. For instance, braided lines can be slick and require knots that bite down firmly, while monofilament is more forgiving.
The Essential All-Rounder: The Improved Clinch Knot
If there's one knot every freshwater angler in Mississippi should have in their arsenal, it's the Improved Clinch Knot. It's reliable, relatively easy to tie, and incredibly versatile for most standard applications.
When and Why to Use It
The Improved Clinch Knot is your go-to for tying monofilament or fluorocarbon lines directly to hooks, swivels, snaps, or the eye of a lure. It's incredibly popular for a reason: it's strong and dependable. When you're rigging up for Crappie Fishing Techniques for Mississippi Lakes or casting for bass, this knot is likely what you'll use most often. Its design minimizes slippage, which is crucial when a big fish puts a sudden strain on your line. While it's particularly effective with mono and fluoro, it's generally not recommended for braided lines, as braid's slick surface can cause it to slip.
Step-by-Step Tying Guide
Learning the Improved Clinch Knot takes a bit of practice, but once you get it, it's second nature. Here’s how to tie it:
- Insert and Twist: Pass the tag end of your fishing line through the eye of your hook or lure. If you're using heavier line, or a hook with a small eye, you might need to pass it through twice for added security.
- Make Wraps: Bring the tag end back up and wrap it around the standing line (the main line coming from your reel) five to seven times. For heavier line, fewer wraps (5-6) are usually sufficient; for lighter line, go for more (7+).
- Back Through the Loop: Thread the tag end back through the first loop you created right above the hook eye.
- Double Back: Now, and this is the "improved" part, take that same tag end and thread it back through the larger loop you just created by making the wraps. You'll have two loops the tag end passes through.
- Moisten and Pull: Moisten the knot with a bit of saliva. This is critical for reducing friction as you cinch it down, preventing heat buildup that can weaken the line. Slowly pull on the standing line while guiding the tag end and the hook with your other hand. The coils should cinch down neatly and tightly against the eye of the hook.
- Trim: Once the knot is tight and looks uniform, trim the tag end, leaving about 1/8 to 1/4 inch. Trimming too close can cause the knot to unravel under pressure.
Common Mistakes to Avoid: Don't rush the cinching process. If you pull too fast without moistening, the friction can weaken your line. Also, ensure your wraps are neat and not overlapping. A messy knot is a weak knot.
Uniting Lines: The Double Uni Knot and Albright Knot
Sometimes, you need to connect two separate pieces of fishing line – perhaps a strong main line to a more discreet leader, or two sections of line that have broken. That's where line-to-line connection knots come into play.
The Double Uni Knot for Line-to-Line Connections
The Double Uni Knot is an absolute champion for connecting two lines, especially if they are of similar or slightly differing diameters. It's incredibly strong and relatively compact, allowing it to pass through rod guides smoothly. Many anglers, especially those targeting crappie or bass with fluorocarbon leaders and braided main lines, swear by this knot. For instance, if you’re using 10 lb braided main line and want a nearly invisible 8 lb fluorocarbon leader, the Double Uni is an excellent choice. This practice helps adhere to some Mississippi Catfish Regulations or other species-specific rules where line visibility might play a role in finicky bites.
Step-by-Step Tying Guide:
- Overlap Lines: Lay the two lines you want to connect parallel to each other, overlapping by about 6-8 inches.
- First Uni Knot: Take the tag end of the first line and fold it back over itself, forming a loop. Then, wrap this tag end around both lines (its own standing line and the second line) inside the loop, 5-6 times.
- Cinch First Knot: Moisten the wraps and slowly pull the tag end to cinch this first uni knot down onto its own standing line. It should form a snug barrel.
- Second Uni Knot: Now, take the tag end of the second line and repeat the process. Form a loop, wrap it around both lines (its own standing line and the first line) inside the loop, 5-6 times.
- Cinch Second Knot: Moisten and slowly pull the tag end to cinch this second uni knot down onto its own standing line.
- Bring Together: Moisten both knots again. Now, pull firmly on the two main lines (the standing lines). The two cinched uni knots should slide together, butt up against each other, forming a single, strong connection.
- Trim: Trim both tag ends very close to the knot.
The Albright Knot for Disparate Line Sizes
While the Double Uni is fantastic, sometimes you need to connect lines with vastly different diameters or materials, such as a heavy braided main line to a much lighter monofilament or fluorocarbon leader, or a heavy leader for toothy fish. This is where the Albright Knot shines. It’s a bit more complex than the Double Uni, but it creates a remarkably strong and relatively sleek connection between very different lines.
Step-by-Step Tying Guide:
- Form a Loop (Heavy Line): Take the heavier line (often your braided main line) and form a small loop, pinching it closed.
- Insert Lighter Line: Pass the tag end of the lighter line (your leader) through the center of the loop formed by the heavier line.
- Wrap Around Both: Hold the loop of the heavier line firmly. With the lighter line, wrap its tag end around both strands of the heavier line's loop, and also around its own standing line, working your way back towards the loop's bend. Make about 10-15 snug wraps. More wraps are generally better for braided line on the lighter side.
- Back Through Loop: Once you've made your wraps, pass the tag end of the lighter line back through the original loop of the heavier line, entering from the same side it exited. It should now be going in the opposite direction from when it first entered.
- Moisten and Pull (Lighter Line): Moisten the wraps of the lighter line. Slowly pull on the standing line of the lighter line while holding the tag end of the lighter line. The wraps should tighten down neatly onto the heavier line's loop.
- Cinch Main Knot: Now, pull on the standing lines of both the heavy and light lines simultaneously. The Albright knot should cinch down tightly and evenly.
- Trim: Trim both tag ends close to the knot. It’s important to make sure the heavier line’s loop is pulled very tight so the lighter line's wraps are locked in.
Secure Loops and Terminal Tackle: The Palomar Knot and Surgeon's Loop
Beyond connecting lines, you often need to attach terminal tackle (hooks, swivels, lures) or create loops for specific rigging scenarios. These two knots are indispensable for those tasks.
The Palomar Knot: Strength for Braided Line
If you primarily fish with braided line, the Palomar Knot should be your best friend. It’s widely recognized as one of the strongest and most reliable knots for braid, though it works perfectly well with monofilament and fluorocarbon too. Its simple, double-wrap design distributes stress incredibly well, preventing the line from cutting itself under pressure. For anglers using braided line for targeting powerful species or in heavy cover, this knot offers unmatched confidence. This is a must-know for anyone getting into How to Tie a Palomar Knot.
Step-by-Step Tying Guide:
- Double the Line: Double about 6-8 inches of your fishing line, creating a loop.
- Pass Through Eye: Pass this doubled loop through the eye of your hook, swivel, or lure.
- Overhand Knot: Tie a simple overhand knot with the doubled line and the hook/lure. Crucially, make sure the hook or lure hangs freely within the loop you just made. Do not tighten this overhand knot yet.
- Bring Loop Over Tackle: Take the loop of doubled line you made and pass it completely over the hook, lure, or swivel.
- Moisten and Cinch: Moisten the line generously. Now, hold the standing line and the tag end firmly, and pull them simultaneously while guiding the knot down to the eye of the hook. The loop will close around the eye, and the knot will cinch down tightly and neatly.
- Trim: Trim the tag end close to the knot.
The beauty of the Palomar is its simplicity and strength, especially for the sometimes-slippery nature of braided lines.
The Surgeon's Loop for Versatile Rigging
While the Palomar excels at attaching tackle directly, the Surgeon's Loop (or Double Surgeon's Loop for added strength) is fantastic for creating a strong, fixed loop at the end of your line. This loop can be used for attaching a quick-change leader, creating a dropper loop for multiple baits, or even as an anchor point for your main line when setting up complex rigs, often seen in Catfish Fishing Techniques with multiple hooks or large weights. It’s also very easy to tie, even with cold hands or in low light.
Step-by-Step Tying Guide:
- Double the Line: Double about 8-10 inches of your fishing line back on itself to create a large loop. This is the main loop you'll be working with.
- Form an Overhand Knot: Take the doubled section and form a simple overhand knot with it. Don't tighten it yet. This effectively creates a second, smaller loop within the first large loop.
- Pass Through Again: Pass the end of the large loop through the center of the overhand knot you just formed. You’re essentially threading the entire large loop through the overhand knot. You can do this once for a "single" surgeon's loop or twice for a "double" surgeon's loop (which is stronger and generally recommended).
- Moisten and Pull: Moisten the line. Slowly pull on the main line and the tag end (the two loose ends) simultaneously. The wraps of the overhand knot will tighten around the larger loop, forming a very secure, non-slip loop at the end of your line.
- Trim: Trim the tag end close to the knot.
This loop knot is incredibly useful for creating different presentations, especially when you want to change out terminal tackle quickly or rig multiple baits on a single line.
Tools, Tips, and Troubleshooting Your Knots
Tying great knots isn't just about knowing the steps; it's about having the right tools, avoiding common pitfalls, and making practice a regular part of your routine.
Essential Knot-Tying Tools
While you can tie many knots with just your fingers and teeth (please don't use your teeth on fishing line, it's bad for them and the line!), a few simple tools can make the process easier, faster, and result in stronger knots.
- Line Clippers/Nippers: These small, sharp tools are invaluable. They provide a clean cut to your tag ends, preventing frayed edges that can weaken the knot or catch on debris. A good pair of nippers, easily found on Amazon or at your local tackle shop, is far superior to using a knife or scissors. Some even come with a small needle to help clear out knot eyes.
- Hemostats or Pliers: These are great for gripping small tag ends, especially with heavy line, or for applying extra pressure when cinching down stubborn knots. They also help remove hooks safely from fish!
- Knot-Tying Tools: For anglers with dexterity issues, or those who simply want absolute consistency, there are various knot-tying tools available. Some are designed for specific knots, like the FG knot (a very advanced braid-to-fluoro knot), while others offer general assistance for gripping and wrapping. Searching "fishing knot tying tool" on Amazon will reveal a wide array of options, from simple knot pickers to more complex devices. These can be particularly helpful when tying knots with very light or very heavy line that's hard to manipulate.
Common Knot Tying Mistakes and How to Avoid Them
Even seasoned anglers can make mistakes. Recognizing them is the first step to tying perfect knots every time.
- Not Moisten the Line: This is perhaps the most common and detrimental mistake. As you cinch a knot, friction generates heat. This heat can actually weaken or even melt fishing line, especially fluorocarbon and monofilament. Always moisten your knot with water or saliva before pulling it tight.
- Not Tightening Properly: A loosely cinched knot is a weak knot. Every wrap and turn needs to be pulled snug and uniform. Take your time, pull slowly and steadily, ensuring the coils lay perfectly against each other without crossing or gaps.
- Leaving Too Much or Too Little Tag End: Leaving too much tag end can cause tangles or catch weeds. Trimming too close (flush with the knot) can cause the knot to slip and unravel, especially under sudden pressure. Aim for 1/8 to 1/4 inch of tag end as a general rule, depending on the knot and line type.
- Using the Wrong Knot for the Wrong Application/Line Type: Attempting to tie an Improved Clinch with braided line is asking for trouble because braid is too slick for it to hold. Conversely, a Palomar is overkill for ultra-light mono where a perfectly tied Uni Knot might suffice. Understand the strengths and weaknesses of each knot and match it to your line and tackle. Knowing when to use different knots is as important as knowing Which Mississippi Lake Holds the State Record Crappie if you hope to land one.
Practicing for Perfection
Just like learning to cast or properly operate your Choosing the Right Rod and Reel for Mississippi Fishing, knot tying requires practice. Don't wait until you're on the boat with a fish biting to try a new knot.
- Practice at Home: Grab some spare line (different types if you have them – mono, fluoro, braid) and a hook or swivel. Sit down in front of the TV and just tie knots repeatedly. The muscle memory you build will be invaluable when you're on the water.
- Consistency is Key: Aim for consistently neat and uniform knots. A messy knot is a weak knot. The more you practice, the faster and more reliably you'll tie them, even under pressure.
- Check Your Knots Frequently: While fishing, especially after catching a few fish or getting snagged, make it a habit to check your knots. Run your fingernail over them, give them a gentle tug. If they look frayed, worn, or deformed, cut them off and re-tie. It's a small investment of time that can save a big fish.
Understanding these knots and practicing them will significantly enhance your fishing experience. Whether you’re fishing the Best Fishing Spots in Mississippi or just your local pond, strong knots are your best ally. Remember, a good knot is the foundation of a successful catch, ensuring that when you finally hook that dream fish, nothing stands between you and bringing it to the net. And always make sure you've got your Mississippi Fishing License Guide covered!
Here's a quick summary of the knots we've discussed:
| Knot Name | Primary Use | Best for Line Type | Pros | Cons |
|---|---|---|---|---|
| Improved Clinch Knot | Tying to hooks, lures, swivels | Monofilament, Fluorocarbon | Strong, simple, versatile for single line attachment | Not ideal for braided line; can slip |
| Double Uni Knot | Connecting two lines of similar diameter | All (especially braid-to-fluoro leader) | Very strong, relatively compact, easy to learn | Can be bulky if lines are very different in diameter |
| Albright Knot | Connecting lines of dissimilar diameters | All (especially braid to heavy mono/fluoro) | Excellent strength for disparate line sizes, fairly sleek | A bit more challenging to tie correctly |
| Palomar Knot | Tying to hooks, lures, swivels | Braided line, Monofilament, Fluorocarbon | Extremely strong, simple, minimizes line damage | Requires passing a loop through the hook eye, can be tricky with large lures/small eyes |
| Surgeon's Loop | Creating a fixed loop at line end | All | Simple, strong loop, great for dropper rigs or quick-change leaders | Creates a loop, not for direct terminal tackle attachment |
Disclaimer
The information provided in this guide is for general educational and informational purposes only. Fishing regulations, techniques, and safety practices can vary, and it is the angler's responsibility to understand and comply with all current local, state, and federal laws and regulations, including those set by the Mississippi Department of Wildlife, Fisheries, and Parks (MDWFP). Always prioritize safety on the water.