How to Clean an Alligator Gar
If you've ever tried to clean an alligator gar, you know it's not like cleaning a bream or a bass. Their incredible armor plating can be incredibly intimidating and frustrating, often leading anglers to release these magnificent fish rather than attempt to process them for a meal. This comprehensive guide will walk you through the precise steps and essential tools needed to safely and effectively clean an alligator gar, ensuring you can enjoy its delicious, white meat.
Why Alligator Gar Are So Challenging to Clean
Let's be honest, alligator gar are built like tanks. Their scales aren't just scales; they're interlocking bony plates, a natural suit of armor that makes traditional filleting knives laugh in your face. Many first-time gar cleaners feel completely defeated after just a few minutes, struggling to even make a dent. It's a common frustration, and one that often prevents anglers from enjoying a truly unique and tasty fish.
The Nature of Gar Armor: A Real Challenge
Imagine trying to cut through a medieval knight's breastplate with a kitchen knife. That's a pretty good analogy for tackling alligator gar scales. These rhombic ganoid scales are made of ganoin, a hard, enamel-like substance, and they interlock tightly, creating a protective barrier that even some of the sharpest knives struggle to penetrate. This isn't just a thick skin; it's a solid, inflexible shield that requires a completely different approach than what you're used to with most other fish species. It's why many anglers, after landing a true monster, often stare at it wondering "Now what?" The sheer density and arrangement of these scales are the primary reason why cleaning an alligator gar is a special operation, and why having the right strategy is key. Understanding this structural challenge is the first step toward conquering it.
Common Misconceptions and Frustrations
A big misconception is that you can just "scale" a gar or simply cut through the skin like you would a catfish or a snapper. This leads to broken knife tips, dull blades, and a whole lot of wasted effort and bad language. Anglers often get frustrated trying to find a weak point, or attempting to force a fillet knife where it simply won't go. Another common mistake is thinking you can use standard fish cleaning tools; they're simply not up to the task. This often results in a messy, incomplete job, or worse, an injury. Don't let these common pitfalls discourage you. With the right tools and technique, you'll be amazed at how efficient the process can become. Many people just give up, but the truth is, the delicious meat inside is absolutely worth the extra effort. If you're wondering Is Gar Good to Eat?, the answer is a resounding yes, once you get past that armor!
Essential Tools for Tackling Gar Armor
To successfully clean an alligator gar, you need to set aside your standard fillet knife for the initial breach. This is where specialized tools come into play, tools designed to handle tough materials, not just soft flesh. Having the right arsenal will not only make the job easier but also safer. You wouldn't try to build a house with a screwdriver, and you shouldn't try to clean a gar without the proper gear.
Heavy-Duty Cutting Implements
This is where the magic happens. You're going to need tools with some serious cutting power. Think of it less like filleting a fish and more like performing minor demolition.
- Tin Snips or Aviation Shears: These are your primary weapons against the gar's armor. Heavy-duty tin snips, often used for cutting sheet metal, work wonders for scoring and cutting through the tough scales along the back and belly. Look for a pair with comfortable handles and a strong spring action. Many anglers find reliable options available on platforms like Amazon.
- Small Hatchet or Cleaver: For truly massive gar, or for quickly dispatching a small section of armor, a small hatchet or a heavy-duty cleaver can be incredibly effective. The idea here isn't precision, but brute force to break through stubborn areas. Just be extremely careful with these tools, as they require a stable cutting surface and keen attention to safety.
- Electric Saw (e.g., Reciprocating Saw with a Fine-Tooth Blade): While it might sound extreme, some experienced gar handlers swear by an electric reciprocating saw for the initial cuts on very large specimens. This allows you to cut straight through the bony armor with relative ease. A fine-tooth blade will help create a cleaner cut. This is certainly not for everyone and requires extreme caution, but it's an option to consider for trophy-sized fish. You can find various models and blades suitable for this task on Amazon, just ensure safety features are prioritized.
- Sturdy, Sharp Knife: Once the armor is breached, you'll still need a good, sharp utility knife or a strong hunting knife for separating the meat from the skin and backbone. Your delicate fillet knife can come out for the final stage of precise meat removal, but only after the heavy lifting is done. Keep it incredibly sharp, as gar meat can be firm.
Protective Gear and Workstation Setup
Safety and efficiency go hand-in-hand when cleaning a gar. You'll be working with sharp tools and a potentially slippery fish, so preparation is key.
- Heavy-Duty Gloves: You absolutely need a good pair of cut-resistant gloves. The gar's scales are sharp, and your tools are even sharper. Standard rubber dish gloves won't cut it (pun intended). Look for industrial-grade, cut-resistant gloves, available at hardware stores or on Amazon, to protect your hands from accidental slips or cuts.
- Stable Cutting Surface: A large, sturdy cutting board that won't slide around is crucial. Many anglers use a dedicated wooden board or even a clean piece of plywood laid across sawhorses. The gar is a large fish, so don't try to clean it on a tiny kitchen cutting board.
- Hose or Water Source: Having a hose nearby for rinsing off scales, blood, and slime as you work will keep your area cleaner and reduce slipperiness. A clean workspace makes the entire process much more manageable.
- Plenty of Space: Cleaning a gar is not a cramped countertop job. You need room to maneuver the fish and your tools safely. Consider setting up outdoors, perhaps in a garage or shed, where mess isn't an issue.
Sharpening and Maintenance for Longevity
Even heavy-duty tools will dull when tackling gar armor. Proper maintenance is essential to keep your tools effective and safe.
- Knife Sharpener: Invest in a quality knife sharpener – either a sharpening stone, an electric sharpener, or even a pull-through sharpener designed for hunting knives. You'll likely need to touch up your utility knife or cleaver throughout the process, and certainly before and after. A dull blade is a dangerous blade, requiring more force and increasing the risk of slips.
- Tool Cleaner/Lubricant: After the job, clean all your tools thoroughly to remove any fish residue. For tin snips and saws, apply a light coat of oil or lubricant to prevent rust, especially if they're not stainless steel. This will extend the life of your valuable equipment and ensure it's ready for your next catch. Taking care of your gear means it will take care of you on future fishing adventures. Remember, a well-maintained tool is a joy to use, while a neglected one can be a source of constant frustration.
| Tool Type | Best Use | Alternative | Safety Considerations |
|---|---|---|---|
| Tin Snips/Shears | Initial cuts along spine and belly, scoring | Heavy-duty kitchen shears | Keep fingers clear, use protective gloves |
| Small Hatchet/Cleaver | Breaking tough armor, severing head (optional) | Meat saw, bone saw | Extremely sharp, requires stable surface, firm grip |
| Electric Reciprocating Saw | Cutting through thick armor on large gar | Very heavy-duty tin snips (for smaller gar) | Eye protection, ear protection, firm grip, power safety |
| Sturdy Utility Knife | Separating meat from skin/bones, trimming | Hunting knife, boning knife | Always cut away from body, keep sharp |
| Fillet Knife | Final detailed filleting, trimming silverskin | Small, sharp utility knife | Use only on exposed meat, very sharp, careful technique |
| Cut-Resistant Gloves | Hand protection from scales and sharp tools | Layered leather gloves (less effective) | Essential protection, check for damage regularly |
Step-by-Step Guide to Cleaning an Alligator Gar
Alright, let's get down to business. Cleaning an alligator gar is a methodical process, not a race. Take your time, focus on safety, and follow these steps. You'll be surprised at how manageable it becomes once you understand the technique.
Preparing the Gar for Cleaning
Before you even think about cutting, make sure your gar is properly prepared and your workspace is optimized.
- Secure the Fish: Alligator gar can be slippery and powerful, even when deceased. Lay the gar on its side on your sturdy cutting surface. Some anglers like to tie the tail to something secure or use clamps to prevent it from flopping. For smaller gar, a non-slip mat under your cutting board can suffice. The goal is to keep it from moving unexpectedly while you're wielding sharp tools. Ensuring the fish is stable is paramount for safety.
- Rinse Thoroughly: Give the gar a good rinse with your hose. This will remove any excess slime, dirt, and debris, making the scales a bit less slippery and your work surface cleaner. While it won't make the armor any softer, it helps with grip and hygiene.
- Locate the Prime Meat Sections: Alligator gar meat is primarily found along the backstraps and in the tail section. You're essentially aiming to remove these "loins" of meat from the armored body. Visualize where these sections are on the fish. For instance, like many other large fish, the firm white meat runs along the spine. This focus helps guide your initial cuts. Don't worry about the belly meat; it's minimal and often contains more fat and bone than it's worth.
Breaking Through the Armor Plating
This is the most challenging part, where your heavy-duty tools come into play. The key is to cut around the armor, not necessarily through it entirely, for the initial stage.
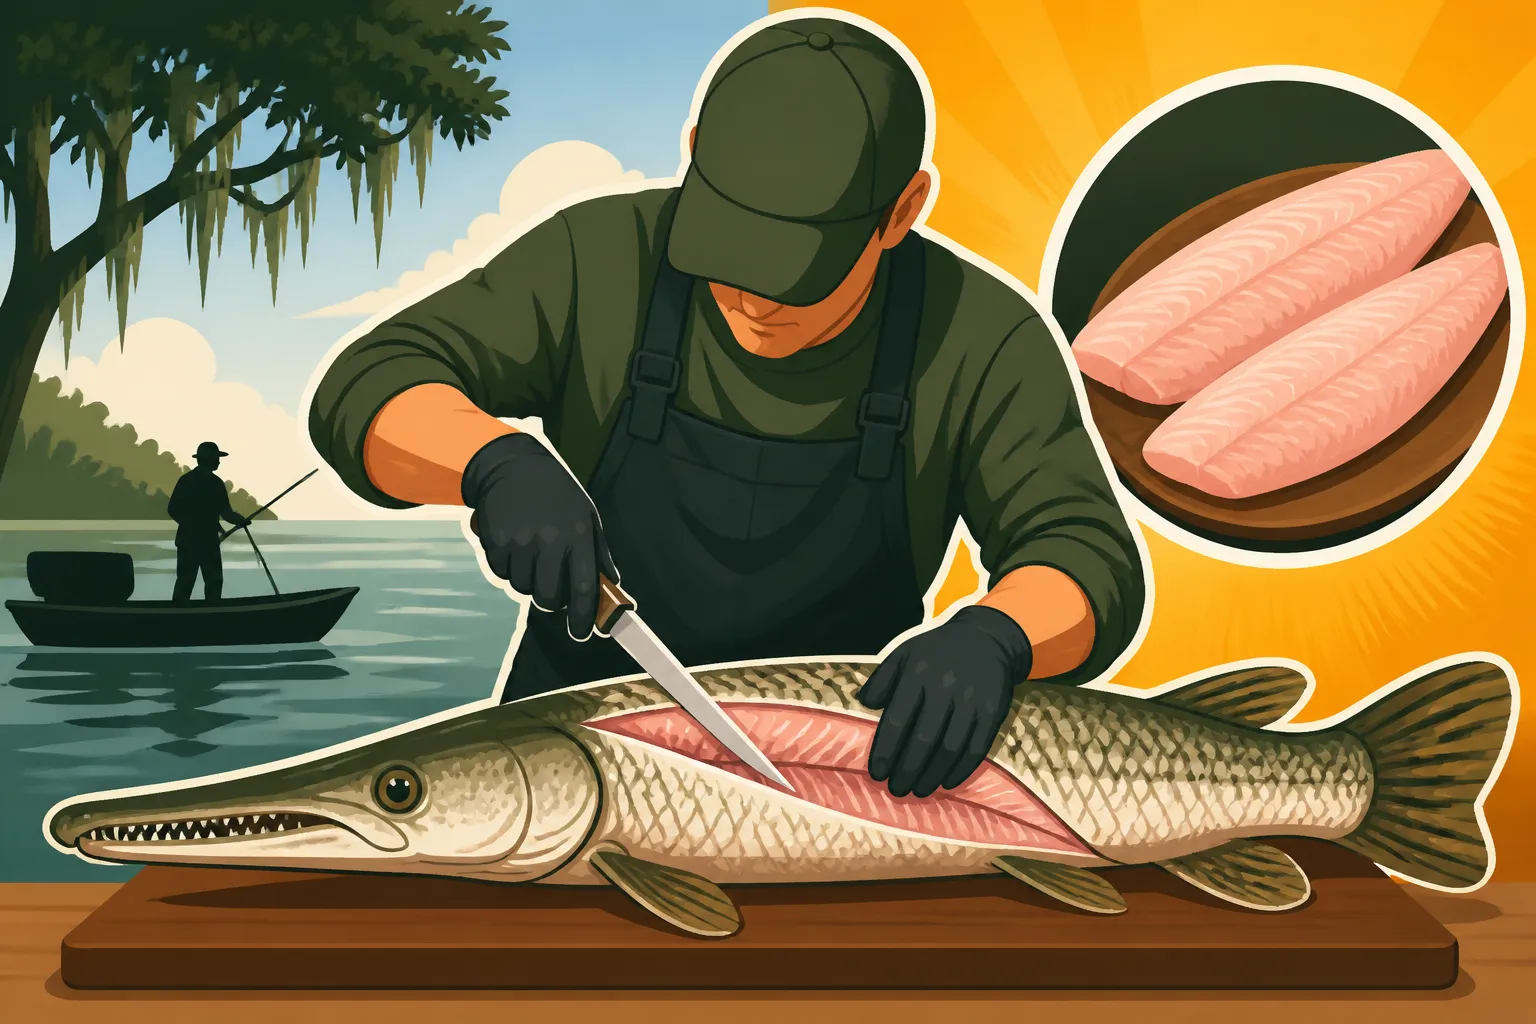
- First Cut: Along the Dorsal Fin: With your heavy-duty tin snips or even a small hatchet for large gar, make a deep score or cut straight down the top of the gar's back, right along the dorsal fin, from just behind the head all the way to the tail. You're aiming to cut through the scales, not necessarily into the meat deep at this point. This creates a "zipper" line. If using a saw, this is where you'd run it down the length of the back. Some folks like to use a chisel and hammer for this initial score, especially on older, larger fish. It truly feels like an engineering project. For some context, the Alligator Gar Fishing in Mississippi article delves into catching these beasts, and this is the next logical step after a successful catch.
- Second Cut: Along the Lateral Line: Now, repeat this process along the lateral line on both sides of the fish. This line is usually visible as a faint ridge or color change. This forms the upper and lower boundaries of the "fillet block" you're trying to extract. Again, you're mostly cutting through the armor. If using a saw, make these parallel cuts on each side. The goal is to create two long strips of armored backstrap. This is where your cut-resistant gloves really earn their keep, preventing any sharp scales from getting you.
- Third Cut: Around the Tail: Use your tin snips or hatchet to cut around the circumference of the tail section, just before it begins to narrow significantly. This will allow you to access the tail meat, which can be quite substantial on larger gar. This creates a section you can potentially remove separately or simply helps delineate your filleting area.
- Fourth Cut: Connecting the Sides (Optional but Helpful): For some, especially with smaller gar, you can use the tin snips or a strong utility knife to make cuts connecting the dorsal line and the lateral line at intervals, creating "strips" of armor that can be pried off. This helps you get a better grip. For larger fish, the saw makes these cuts cleanly. The goal is to allow the armor to separate from the meat beneath. This approach is sometimes called the "tin can" method, because you're essentially peeling back the metal.
Removing the Skin and Filleting
Once the armor is sufficiently compromised, the real filleting can begin. This is where your sturdy utility knife and later, your regular fillet knife, will shine.
- Prying Off the Armor Sections: With the cuts made, use a flat-head screwdriver, a strong butter knife, or even the back of your utility knife to start prying up the edges of the armored sections you've outlined. Work slowly and methodically. You'll hear and feel the scales popping away from the underlying meat. Once you get a good purchase, you can often peel large sections of the armor off, revealing the pristine white meat beneath. This takes a bit of force and patience, but it's incredibly satisfying when that armor comes off. This method minimizes meat loss and maximizes the amount of usable fillet.
- Separating the Fillets: Once the armor is largely removed, you'll be left with long, skin-on fillets. Now, use your sturdy utility knife to carefully separate the meat from the backbone. Run your knife along the spine, just like you would with a catfish, being careful to stay close to the bones to maximize your yield. The meat should be firm and white. This is where good knife skills come into play. If you've cleaned other fish before, like using techniques from How to Fillet a Catfish or How to Fillet a Crappie, you'll find this step more familiar, just applied to a firmer fish.
- Skinning the Fillets: With the fillets off the bone, lay them skin-side down on your cutting board. Use your sharp fillet knife, holding the tail end of the fillet firmly, and carefully slide the knife between the meat and the skin. Keep the blade angled slightly down toward the skin to avoid wasting any meat. This should come off relatively easily now that the hard armor is gone. You'll be left with beautiful, boneless, skinless gar fillets.
Processing and Preparing Your Gar Meat
Congratulations! You've successfully navigated the armored labyrinth of an alligator gar. Now comes the rewarding part: getting that delicious meat ready for the kitchen.
Inspecting and Trimming the Fillets
Even after all that hard work, a little extra attention to detail will ensure your gar meat is top-notch.
- Remove Any Red Meat or "Mud Veins": Alligator gar, especially larger ones, can sometimes have a darker red line of meat along the lateral line, or other discolored patches. This is often referred to as a "mud vein" or bloodline. While not harmful, it can impart a stronger, gamier flavor to the meat. Use your fillet knife to carefully trim away any of these red or discolored areas. You want pure, white meat for the best flavor. This step is crucial for achieving that mild, flaky texture that gar is known for.
- Check for Bones: While alligator gar are not typically bony like some freshwater fish, always run your fingers along the fillets to check for any stray bones or cartilage. If you find any, use a pair of fish pliers or tweezers to remove them. A bone-free fillet makes for a much more enjoyable eating experience.
- Silverskin Removal: Sometimes, a thin, silvery membrane (silverskin) can be present on the outside of the fillet. This can be tough when cooked. If you notice it, gently slide your fillet knife under the edge of the silverskin and carefully slice it away. It’s a similar process to trimming silverskin from venison or beef.
Storage and Culinary Considerations
Once trimmed, your gar fillets are ready for storage or immediate cooking. They're incredibly versatile!
- Short-Term Storage: For immediate use, place the fillets in an airtight container or zip-top bag in the refrigerator. They will keep fresh for 1-2 days. If you've caught a few, you might want to consider some tips from How to Keep Fish Fresh on a Hot Day if you're not heading straight home.
- Long-Term Freezing: Gar meat freezes exceptionally well. Wrap individual fillets tightly in plastic wrap, then place them in freezer bags, removing as much air as possible. You can also vacuum seal them for optimal freezer life. Properly frozen gar can last for several months without significant loss of quality. Label and date your bags so you know exactly what you have.
- Cooking Versatility: Alligator gar meat is firm, white, and has a mild, sweet flavor, often compared to snapper or even chicken. It's fantastic fried, grilled, baked, or smoked. It holds up well to robust seasonings and can be a star in dishes like gar balls (a southern delicacy), fish tacos, or a hearty fish stew. Don't be afraid to experiment with your favorite freshwater fish recipes; the gar will likely adapt beautifully.
Utilizing the Leftovers
While the focus is on the delicious fillets, there are always other parts of the fish to consider, even if it's just for responsible disposal.
- Disposal of Carcass: The armored carcass, head, and bones should be disposed of properly. This often means bagging them securely and placing them in your household trash for pickup, or if regulations allow and you have the space, burying them away from water sources. Check local regulations regarding disposal of fish carcasses. It's important to be a responsible angler and ensure no waste is left behind. Remember, adhering to proper guidelines is part of understanding Mississippi Fishing Regulations Explained.
Disclaimer
This article is for general informational purposes only and does not constitute professional advice. Laws, prices and regulations vary by location and change over time. Consult a qualified professional for guidance on your specific situation.