How to Anchor a Kayak for Fishing
There's nothing quite like the freedom of kayak fishing in Mississippi, feeling the water beneath you and the sun on your face. But let's be real, that serene picture can quickly turn into a frustrating paddle-fest when the wind kicks up, or the current decides to take you on an unexpected tour past your perfect fishing spot. Constantly fighting to stay put, spooking fish with your frantic paddling, and missing prime casting windows? We've all been there. This guide is going to walk you through everything you need to know about anchoring your kayak effectively and safely, so you can spend less time drifting and more time landing those beautiful Mississippi catches.
Why Kayak Anchoring is a Game Changer for Mississippi Anglers
For many kayak anglers, the thought of dropping anchor seems counter-intuitive to the lightweight, mobile nature of paddlecraft. However, mastering anchoring techniques can dramatically enhance your fishing experience, transforming a struggle against the elements into a strategic advantage. It allows for precision, patience, and ultimately, more fish in the net.
The Frustration of Uncontrolled Drifting
Imagine this: you've finally found that perfect brush pile on Ross Barnett Reservoir, or you're positioned just right at the mouth of a tidal creek on the Gulf Coast. You make a perfect cast, your lure hits the water, and then a gust of wind or a subtle shift in current nudges your kayak just enough to throw off your drift. You try to paddle back, but by the time you're reset, you've either spooked the fish, missed the bite, or completely overshot your target. It's a dance of constant adjustment that pulls you away from the pure joy of fishing. This uncontrolled drifting not only saps your energy but also limits your ability to thoroughly work a piece of structure or a specific depth range. You end up reacting to the elements instead of actively engaging with the fish.
This frustration is particularly acute when you're trying to fish small, precise targets or when you need to remain stationary for a longer period. Perhaps you're waiting out a bite, trying to entice a stubborn bass, or setting up for a specific presentation like soaking bait for catfish. Without a stable platform, every cast becomes a rushed affair, and your concentration is split between fishing and fighting the elements. It’s enough to make even the most patient angler want to throw their paddle in the water!
Situations Where Anchoring is Essential
Anchoring isn't just a convenience; it's a necessity in many common Mississippi fishing scenarios. Understanding when and why to deploy your anchor can drastically improve your success rate and overall enjoyment.
Targeting Specific Structure
Whether it's a submerged stump field in a lake like Lake Washington, a fallen tree in the Pearl River, or an oyster reef along the Mississippi Sound, fish love structure. These spots offer cover, ambush points, and food sources. To effectively fish these locations, you need to be able to hold your position, casting repeatedly from different angles without drifting past. An anchor allows you to dissect these high-percentage areas thoroughly, presenting your lure or bait precisely where the fish are hiding. Imagine being able to cast to the exact edge of a crappie brush pile over and over, rather than just getting one hurried pass before you're blown off course.
Fishing in Current and Wind
Mississippi offers a diverse range of fishing environments, from the powerful currents of the Mississippi River to the wind-swept expanses of Grenada Lake. Trying to fish a strong current, like below a spillway or in a river bend, without an anchor is like trying to stand still on a treadmill – you're constantly working just to stay in place. The same applies to windy conditions on large, open reservoirs. An anchor gives you stability, allowing you to focus on your presentation rather than constantly correcting your position with your paddle. This is especially true when river fishing, where the current can quickly pull your bait out of the strike zone. You can also gain an edge by understanding How Wind Direction Affects Bass Fishing and anchoring accordingly.
Still Fishing for Panfish or Catfish
Sometimes, the most effective technique is simply to sit and wait. This is often the case when fishing for bream, bluegill, or various species of catfish. These species often congregate in specific holes, channels, or around bottom structure, and a patient approach with bait is key. An anchor lets you settle into a prime spot, drop your lines, and relax, letting the fish come to you. You can set multiple rods, bait up, and simply enjoy the peace and quiet, knowing your kayak isn't going anywhere. For anglers looking to try this, understanding Best Bait for Catfish in Mississippi can certainly help.
Types of Kayak Anchors: Choosing Your Weapon
Just like you wouldn't use a bass rod for deep-sea fishing, choosing the right anchor for your kayak depends on the type of fishing you're doing and the bottom conditions you expect to encounter. There's no one-size-fits-all solution, but a few main types cover most situations you'll face in Mississippi.
The Grapple Anchor: Versatility and Simplicity
The grapple anchor, sometimes called a folding anchor, is perhaps the most popular choice for kayak anglers, and for good reason. Its arms fold in, making it compact for storage, which is a huge plus in a kayak where space is at a premium. When deployed, these arms splay out to grab hold of various bottom types.
The beauty of the grapple anchor lies in its versatility. It can effectively grab onto rocky bottoms, penetrate softer mud or sand, and even get a purchase in grassy areas by hooking onto roots or weeds. This makes it an excellent all-around choice for a variety of Mississippi lakes and rivers. Many anglers find great deals on these by checking various sporting goods retailers or even through online marketplaces like Amazon, where you can compare different weights and styles. However, while versatile, it's not without its drawbacks. The very design that makes it good at grabbing can also make it prone to snagging on submerged timber or dense brush piles, potentially leading to lost anchors. To minimize this, a good tip is to rig it with a breakaway system, attaching the anchor line to the bottom of the anchor and using a zip tie or light mono to hold it at the top, allowing it to break free if it gets stuck.
The Mushroom Anchor: Best for Soft Bottoms
If you find yourself primarily fishing in areas with soft, muddy, or silty bottoms – think many of Mississippi's shallower lake coves or river backwaters – the mushroom anchor is your friend. True to its name, it's shaped like a mushroom, and its broad, inverted cap creates suction as it settles into the soft substrate.
Mushroom anchors excel in these conditions because they don't rely on "grabbing" anything; rather, they dig in and hold through displacement and suction. This makes them less likely to get snagged on debris that might be buried in the mud. However, their design makes them less effective on hard, rocky bottoms, where they'll simply slide along without gaining purchase. They also tend to be bulkier and heavier than grapple anchors of comparable holding power, which can be a consideration for limited storage space in a kayak. While not as universally applicable as the grapple, if your local honey holes are predominantly soft-bottomed, a mushroom anchor can provide superior, snag-free holding power. You'll definitely want to size it appropriately for your kayak and the currents you anticipate.
The Bruce/Claw Anchor: Serious Holding Power
For those who encounter stronger currents, deeper water, or consistently challenging bottom conditions, the Bruce or Claw anchor steps up to the plate. Originally designed for larger boats, scaled-down versions are available for kayaks. These anchors are known for their exceptional holding power across a wide range of bottom types, including mud, sand, and rock.
The unique claw-like design of a Bruce anchor allows it to dig in quickly and reset itself if it happens to drag, providing a very reliable hold. This can be particularly reassuring when fishing in high wind conditions on large lakes or in significant river currents. They are generally heavier and more expensive than grapple or mushroom anchors, and their fixed, non-folding design means they take up more space. However, for serious kayak anglers who demand maximum security in tough conditions, the Bruce or Claw anchor is a top-tier choice. They offer a peace of mind that can be invaluable when the weather turns or the current is ripping.
Stake-Out Poles & Drag Chains: Specialized Solutions
Beyond traditional anchors, there are several specialized tools that kayak anglers use for specific situations, offering silent deployment or controlled drifting.
Stake-Out Poles
A stake-out pole is essentially a sturdy rod, typically made of fiberglass or aluminum, with a pointed end. It's designed for use in shallow water, usually less than 8-10 feet deep, where you can simply push it into the bottom to hold your kayak in place. The main advantages of a stake-out pole are its quiet operation and ease of deployment and retrieval. You can quietly slide it into the mud or sand without splashing or clanking, which is crucial for not spooking fish in skinny water. It's perfect for stealthy approaches to redfish on the flats of the Mississippi Sound or stalking bass in shallow coves. Many anglers also find them useful for wade fishing, anchoring their kayak and then stepping out to cast. They are lightweight and often float, making them easy to manage.
Drag Chains
A drag chain isn't really an anchor in the traditional sense, but rather a tool for controlled drifting. It's a heavy chain, sometimes with a small anchor attached, that you drag along the bottom. The purpose isn't to stop your kayak completely, but to slow its drift, allowing you to thoroughly fish a long stretch of water, like a river channel or a lengthy weed line. This can be especially effective when you want to cover ground but at a slower pace than the current or wind would naturally take you. It keeps your boat pointed in a more consistent direction and reduces speed, letting your lure or bait stay in the strike zone longer. This technique is often used when searching for actively feeding fish that might be spread out over an area.
Here's a quick comparison of common kayak anchor types:
| Anchor Type | Ideal Bottoms | Pros | Cons | Best Use Case |
|---|---|---|---|---|
| Grapple (Folding) | Rock, Mud, Sand, Grass | Versatile, compact, good all-rounder | Can snag easily, may not hold in strong current | Most freshwater and calm saltwater situations |
| Mushroom | Soft Mud, Silt, Sand | Excellent hold in soft bottoms, less snagging | Bulky, heavy, poor on hard bottoms | Still fishing in shallow, muddy lake coves |
| Bruce/Claw | Mud, Sand, Rock | Superior holding power, resets itself | Heavier, larger, more expensive | Strong currents, windy large lakes, deeper water |
| Stake-Out Pole | Soft Mud, Sand (Shallow Water) | Silent, easy to deploy/retrieve, lightweight | Limited to shallow water, can break | Stealth fishing in flats, shallow coves |
| Drag Chain | Various (for slowing drift) | Controlled drift, covers more water | Doesn't stop boat, can get snagged | Slow trolling, covering long stretches of structure |
Essential Anchoring Accessories and Rigging
Having the right anchor is only half the battle; knowing how to rig it properly with the right accessories is crucial for both effectiveness and safety. These components work together to ensure your anchor holds securely and can be released quickly if needed.
Anchor Line and Management
The anchor line is your direct connection to the anchor, and its properties are more important than you might think. For kayak fishing, a line made of braided nylon or polypropylene is often preferred. Nylon offers a good amount of stretch, which acts as a shock absorber against waves and current, reducing jerking motions on your kayak. Polypropylene floats, which can be useful, but it tends to be less durable. A good rule of thumb for anchor line length is to have at least 3 to 5 times the depth of the water you plan to fish. So, if you're in 10 feet of water, you'll want 30-50 feet of line deployed. This allows the anchor to lie flat and dig in effectively rather than being pulled straight up.
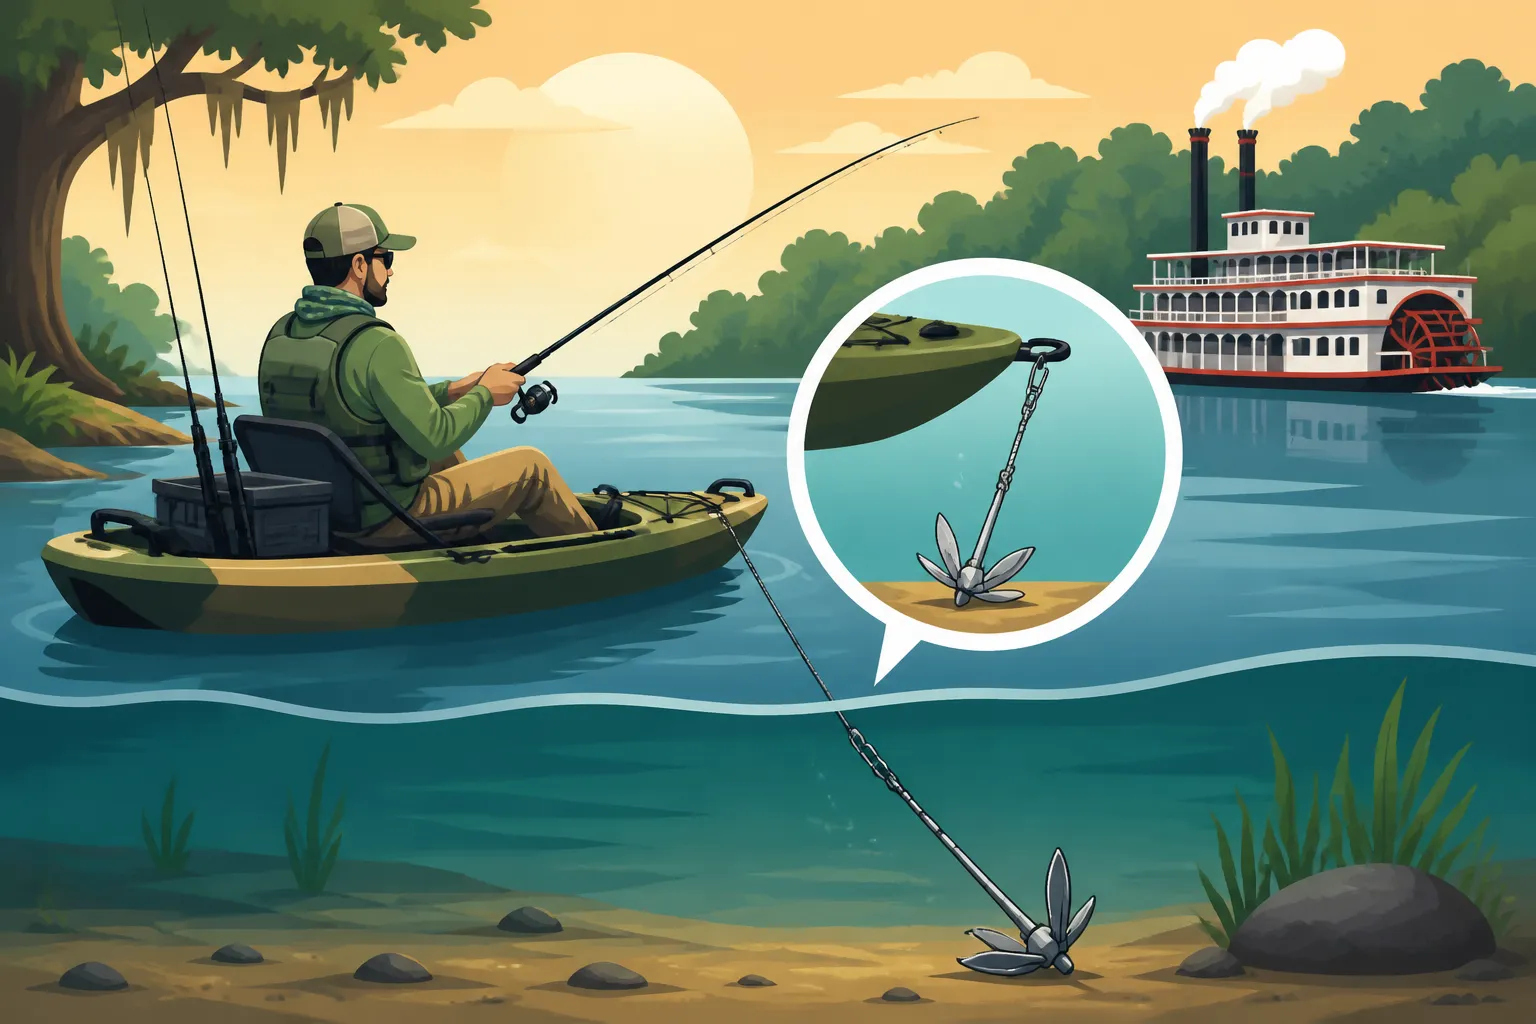
Managing this line in a small kayak can be a challenge. That's where an anchor trolley becomes absolutely indispensable. An anchor trolley system is a simple yet brilliant setup that consists of a loop of rope, pulleys, and a ring that runs along one side of your kayak from bow to stern. Your anchor line attaches to this ring. This allows you to position your anchor line anywhere along the length of your kayak, effectively shifting your anchor point. This means you can anchor off the bow for stability in current, or off the stern to keep your bow pointed downwind, or even off to the side to cast directly into a specific spot. Without a trolley, you're pretty much stuck anchoring directly from where you attach it, which often puts you in a less-than-ideal fishing position or compromises your stability.
Perhaps the most critical accessory related to anchor line management is a quick-release system. This is non-negotiable for kayak safety. In an emergency – like getting hung up in strong current, unexpected capsizing, or a rogue wave – you need to be able to instantly sever your connection to the anchor. This could be a simple clip that you can quickly unclip, or a more sophisticated system. The last thing you want is to be pulled under by a snagged anchor. Always make sure your quick-release is easily accessible and practiced before you hit the water.
The Role of Chain
While often overlooked for kayaks due to weight concerns, a short section of chain between your anchor and the anchor line can make a world of difference in how well your anchor holds. Just a few feet of chain (say, 3-5 feet) serves several crucial purposes.
Firstly, the weight of the chain helps the anchor lay flatter on the bottom. This lower angle of pull allows the anchor's flukes or arms to dig in more effectively, greatly increasing its holding power. Without chain, your line might pull the anchor up at too steep an angle, causing it to drag. Secondly, the chain provides abrasion resistance. The part of your anchor system that is most likely to rub against rocks, shells, or other abrasive bottom features is the section closest to the anchor. Chain is much more resistant to cutting and fraying than rope, protecting your anchor line from damage and preventing a lost anchor. Finally, the added weight of the chain also helps to "set" the anchor more quickly, as it sinks faster and settles into the bottom with more force. You can find pre-cut and weighted chains specifically designed for anchors at most marine supply stores or even on Amazon.
Buoy and Float Systems
Imagine you've used your quick-release system in a hurry, or your anchor line broke, and now your anchor is just sitting on the bottom, lost. That's where a buoy or float system comes in handy. This simple setup involves attaching a brightly colored buoy or float to the end of your anchor line before it goes into the water. If you need to jettison your anchor quickly, you simply toss the line with the attached buoy overboard. The buoy will mark the location of your anchor, allowing you to return and retrieve it later.
This is especially useful for situations where you might have to release your anchor due to a big fish pulling you into danger, or if you get snagged on something immovable and need to move your kayak before trying to free the anchor. It's a small investment that can save you the cost of a new anchor and the frustration of losing your gear. Just make sure the buoy is robust enough to not sink under the weight of your anchor line and anchor, especially in deeper water.
Safe and Effective Kayak Anchoring Techniques in Mississippi
Knowing your gear is one thing, but actually putting it into practice safely and effectively is where the real skill comes in. Kayak anchoring requires a bit of finesse and understanding of how wind and current will affect your small vessel.
Planning Your Anchor Drop
Before you even think about deploying your anchor, a little planning goes a long way. The key is to approach your intended fishing spot from the correct direction.
Approaching Upstream or Upwind
Always approach your target spot from upstream if you're in a river or tidal creek, or upwind if you're on a lake or open water. This allows the current or wind to push you back towards your desired location as you deploy your anchor, rather than away from it. By letting the elements work for you, you can slowly drift back, fine-tuning your position until you're exactly where you want to be. Trying to paddle against the current or wind while deploying an anchor is an exercise in futility and often results in overshooting your mark or getting tangled. Think about it like parking a car: you don't drive past your spot and then try to back into it against traffic. You approach from the correct direction to begin with.
Mind the Current and Wind
Mississippi's diverse waters mean you'll constantly be dealing with varying degrees of current and wind. On a big reservoir like Sardis Lake, a strong gust can quickly push your kayak around. In the Mississippi River, even a gentle current can exert significant force on your boat. Always assess these conditions before dropping anchor. Observe how other boats are positioned, or simply drift for a moment to understand the prevailing forces. Remember that wind and current might not always be going in the same direction, especially in complex areas like bayous or inlets. This understanding helps you anticipate your drift and deploy your anchor strategically. Consider how different conditions might also affect fish behavior, like when Fishing After a Cold Front or during high winds.
Looking for Structure
Modern kayak fishing often involves electronics, and a fish finder is an invaluable tool for precise anchoring. Before dropping your anchor, use your fish finder to locate key underwater structure like brush piles, rock formations, creek channels, or even schools of baitfish that might indicate the presence of predators. This allows you to anchor directly over or just upcurrent/upwind of the structure, maximizing your casting efficiency. If you're targeting crappie, knowing How to Use a Fish Finder to Locate Crappie Brush Piles can give you a significant advantage, ensuring your anchor is precisely placed. Once you've marked your spot, use your anchor trolley to adjust your position so you can cast effectively into the most productive parts of the structure.
Deploying Your Anchor
The act of deploying your anchor should be a smooth, controlled process to avoid spooking fish and ensure a good set.
Gentle Deployment
Once you've decided on your precise drop point, gently lower your anchor into the water. Don't just heave it overboard. A noisy splash can send nearby fish scattering. Let the anchor descend slowly until it hits the bottom. As your kayak continues to drift slightly with the current or wind, slowly pay out enough anchor line (remembering that 3-5x depth ratio) to allow the anchor to set properly. You should feel a slight tug as the anchor digs in. If you don't feel it bite, let out a little more line or allow your kayak to drift a bit further to help it set. This controlled release is crucial for a secure hold.
Using an Anchor Trolley for Optimal Positioning
After your anchor is set, this is where the anchor trolley truly shines. With your anchor line attached to the trolley's ring, you can now pull the trolley's control lines to slide the ring along the side of your kayak. This effectively moves your anchor point forward, backward, or even directly to the side. Want to cast downwind? Slide the trolley to the stern. Need to hold your bow into the current for stability? Slide it to the bow. This ability to adjust your kayak's orientation relative to your anchor point means you can always face the ideal direction for casting, retrieve, and fighting fish, regardless of wind or current direction. It maximizes your casting lanes and minimizes how much you're fighting the elements.
Retrieving Your Anchor
Retrieving your anchor should also be done with safety and efficiency in mind. It's often where people run into trouble if not done correctly.
Maneuvering Over the Anchor
To retrieve a stubborn anchor, the safest method is to paddle or pull your kayak directly over the anchor. This changes the angle of pull from horizontal to vertical, making it much easier to break the anchor free from the bottom. If you try to pull it straight up from a distance, you're fighting the anchor's grip on the bottom, often with very little leverage. Once you're directly above it, a strong, steady pull will usually free it. Be prepared for the sudden release, especially if it was well-stuck, as your kayak might suddenly shift.
Safety Considerations
Always remember your quick-release system. If you cannot free your anchor and the conditions are worsening, or you're simply tired, don't hesitate to use it. A lost anchor is better than a capsized kayak or a dangerous situation. Be mindful of your balance when pulling up a heavy anchor, especially when standing or leaning. Distribute your weight evenly and avoid sudden movements that could upset your kayak. Once the anchor is free, bring it smoothly back into your kayak, being careful not to let it swing wildly and hit you or your gear.
Proper Storage
Once retrieved, coil your anchor line neatly and secure your anchor. Many kayaks have designated spots or clips for anchors. Proper storage prevents tangles, keeps the anchor from rolling around and becoming a tripping hazard, and ensures it's ready for quick deployment next time. Leaving a wet, muddy anchor in the bottom of your kayak can also make a mess, so consider a small bucket or bag to contain it.
Advanced Techniques: Anchor Trolley Mastery and Dual Anchoring
Once you've got the basics down, you can start exploring more advanced anchoring techniques that give you even greater control and versatility on the water.
Precise Positioning with a Trolley
Mastering your anchor trolley is key to unlocking truly precise positioning. Instead of just using it to point your kayak, think of it as a tool to micro-adjust your casting range. If you're fishing a long weed line or a specific contour, you can deploy your anchor upwind/upcurrent and then use the trolley to slowly "walk" your kayak along that feature. You can fish a 20-yard stretch of bank by simply moving your anchor point a few feet at a time along the trolley, making minute adjustments to hit every pocket and seam. This kind of finesse allows you to work an area exhaustively, increasing your chances of finding hidden fish. It's particularly effective when targeting fish that might be spread out but still related to a specific piece of structure or depth.
Using Two Anchors for Stability or Specific Angles
In certain challenging conditions, or when you need to be absolutely rock-solid, a single anchor might not be enough. This is where dual anchoring comes into play. By deploying two anchors, one off the bow and one off the stern (or one upwind and one downwind), you can create a much more stable platform. This is especially useful in strong winds or heavy currents, as it minimizes kayak swing and keeps you pointed exactly where you want to be. It also allows you to orient your kayak at a precise angle to a piece of structure, regardless of the wind or current direction. For instance, if the wind is blowing parallel to a brush pile, you could anchor one off the bow and one off the stern, positioning your kayak perpendicular to the brush pile for optimal casting and working your lures. Just be mindful of entanglement with multiple lines, and always prioritize safety with quick-release mechanisms for both anchors. While you're at it, be sure to know How Many Fishing Poles Can You Use in Mississippi? if you plan on running multiple lines from your stabilized position.
Disclaimer
This article is for general informational purposes only and does not constitute professional advice. Laws, prices and regulations vary by location and change over time. Consult a qualified professional for guidance on your specific situation.